Showing posts with label Sarah Eclavea. Show all posts

Thursday, September 20, 2012

Sarah is taking over the My Lil Monster collection!


Layouts and cards seem to be the theme this week!  And Sarah is here with some of each for you using My Lil Monster.

My Lil Monster is one of my favorite lines so I couldn't resist using the monster theme in both of my layouts! As you can see it works for silly happy monsters and crabby cranky monsters alike! Yep both of these layouts are of my daughter Fran. One one on a good day and one on a not so good day.

On My Crabby Cranky Little Monster I used lots of different alphas from different cardstock alpha sheets and a punchout to make my title. I love mixing alpha fonts on my titles! It was a hot day at the cherry festival and I think my girl had enough pictures for one day!


I used some more alphas on the the You are so Silly layout for my title. I also added some of the alphas to the banner to spell out my daughter's name. Some ribbon from the Ribbon Carousel completed the layout.


I love all things whimsical and these little monsters are cute! I would love getting a card like this in the mail! I used the little 6x6 sheets of paper to make my cards and some of the punchouts. I also threw in some burlap buttons!


I am in love with these cards!  And the ballerina monster is my favorite!  Be sure to visit Sarah's blog also!


Monday, August 20, 2012

ABC Book Tutorial with Sarah


Sarah Eclavea is here on the blog today.  She is a teacher by profession and she came up with a fun idea on how to help your kids with their spelling! Bonus, she made a tutorial for you!!

 
Hi everyone! It's back to school time so I decided to make a little book with the School is Cool collection to help my daughter with her spelling. It's very easy to make and can be made easier or more difficult depepending on the age and skills of the student it is for.


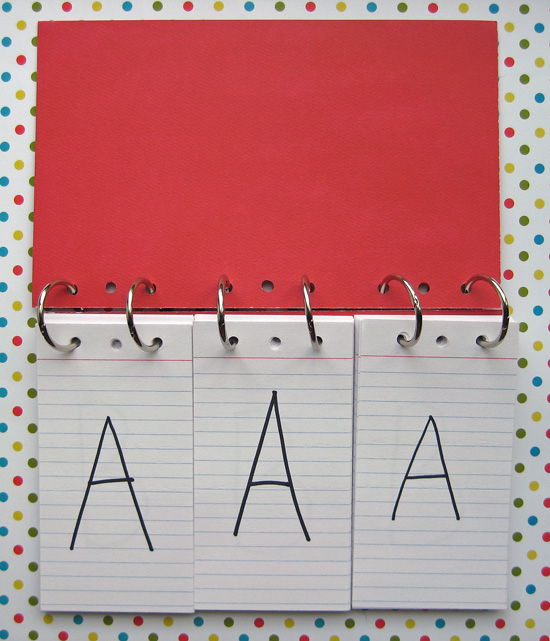
You will need the following to make this book- 26 8x5 index cards, 6 ring clips, one sheet 12 x 12 paper.
 
Step 1- Trim the cardstock to two sheets of 8 x 5 (one for front cover and one for back cover)
 
Step 2- Decorate the front cover with the "School is Cool" papers and punch outs.
 
Step 3- Trim each index card into three pieces of 2.7 inches each
 
Step 4- Write the alphabet (one letter per card) on each index card set.


Step 5- Punch holes through front cover, back cover and index cards and secure with ring clips.
 
Now your book is ready for some spelling! Just flip the pages to spell out lots of three letter words.


To make the book easier you can do only two sets of cards with pictures on one set and the letter is starts with on the other. Or to make it harder you can use four or five sets of cards. There's lots of possibilities with this!
 
The last project I have for you today is a card for my daughter's teacher that holds a gift card.


It is a 4x4 inch card which is the perfect little size for a gift card. I used two glue dots to hold the gift on cardstock. They come off easily when removing the gift card from the card.


Have a great school year everyone!

Well, I think I see a couple of projects that would be fun to make AND to give! That little book you could give to a teacher for her to use in her class and I am sure that teacher probably needs a gift card for something!  

Thanks for stopping by today and be sure to visit Sarah's blog!


Thursday, July 19, 2012

Ms. Sarah on Thursday

Sarah has a jammed packed project post today.  She worked with the School is Cool, Summer and Audrey collections for her projects.   

My Pre-Schooler
 
I know it's still summer, but school will be starting soon and it has inspired me to create this layout of my little pre-schooler. School is Cool is perfect for all the back to school layouts. I used the Cricut Simply Charmed cartridge to cut the little pencil and the word notes.


While the School is Cool paper was out I created a few back to school cards too. In the School is Cool collection there is one sheet of paper divided into 4 mini 6x6 sheets. I cut these sheets out and they are the perfect size for making cards. Now all my cards are ready for my girls' first days back at school. I used the cricut Simply Charmed cartridge to cut the box of crayons.


Snip, Snip
 
Of course Audrey is perfect for all things girl! My sweet girl kept asking me to take her to get her hair cut. I kept putting it off because really I didn't want her growing up any faster! But I finally gave in. I think I was more nervous than she was! On this layout I used a paper piercer to poke holes around the patterned paper and then hand stitched using the holes I poked as a guide with embroidery floss. A little scotch tape helps hold down the floss on the back of the page. I used the Cricut Create a Critter cartridge for the poodle and Simply Charmed cartridge for the little pair of scissors.

Summer at the Carnival
 
One of my favorite releases is Summer! I just love the little critters on here. I love it so much I have just about used all my papers. I created several layouts, cards, and a mini album all from just the collection pack. I still had a few sheets left for this layout and card. My favorite sheet in the collection is the scalloped notebook paper sheet. Love it! I trimmed it on one side and arranged my photos in a grid here.


For my card I punched a circle and handcut some rays for the sun.


Whew, I am worn out from all that creativity in those projects!  Be sure to visit Sarah's blog also!!


Thursday, June 21, 2012

Sarah is here on Thursday!

Diva Sarah Eclavea is here today with a very cute girl layout using the Noah collection!


When I saw the "Noah" line I knew it was perfect for these pictures of my daughter going to see her first movie in the theater! She was too excited to sit still for photos, but I managed to get this one of her and one of her favorite cartoon character Lightning McQueen. I also used some twine from the Twinery and Beacon 3 in 1 adhesive.


How adorable is that road with the car on it! Be sure to visit Sarah's blog also! 

And I totally forgot we need to pick a winner from Erin's guest posting.  The winner is.....
Blogger Kris Berc said...
I adore Erin and am so thrilled to see her back here again to guest design. Love all of her projects! I'd love a chance to create with Audrey :)
Kris, please email me at cardipaws@sbcglobal.net with your shipping address so that we can get the Audrey collection kit out to you!


Wednesday, May 30, 2012

We are Blog Swapping with Basically Bare! Day One!

Do you like embellishments?  Do you like to "create your own" using a bare base?  Well, we are starting a two day blog swap with Basically Bare today and that is just what the Divas are going to show you!  Basically Bare not only has unique and fun mini books to alter, but they have bare chipboard, canvas, arcrylic, and cardboard embellishments to make your own to match your layouts with the paper collection you are working with!

We will also be having a giveaway, but you will have to comment here on the blog and also over at Basically Bare's blog.  Their designers have created some FUN FUN FUN stuff and I can't wait for you to see it!  But, let's look at what the Divas created first!

Laurel Seabrook used the Messages collection to make a journal from one of the mini books the girls were sent.  Here is Laurel to tell you about it.....

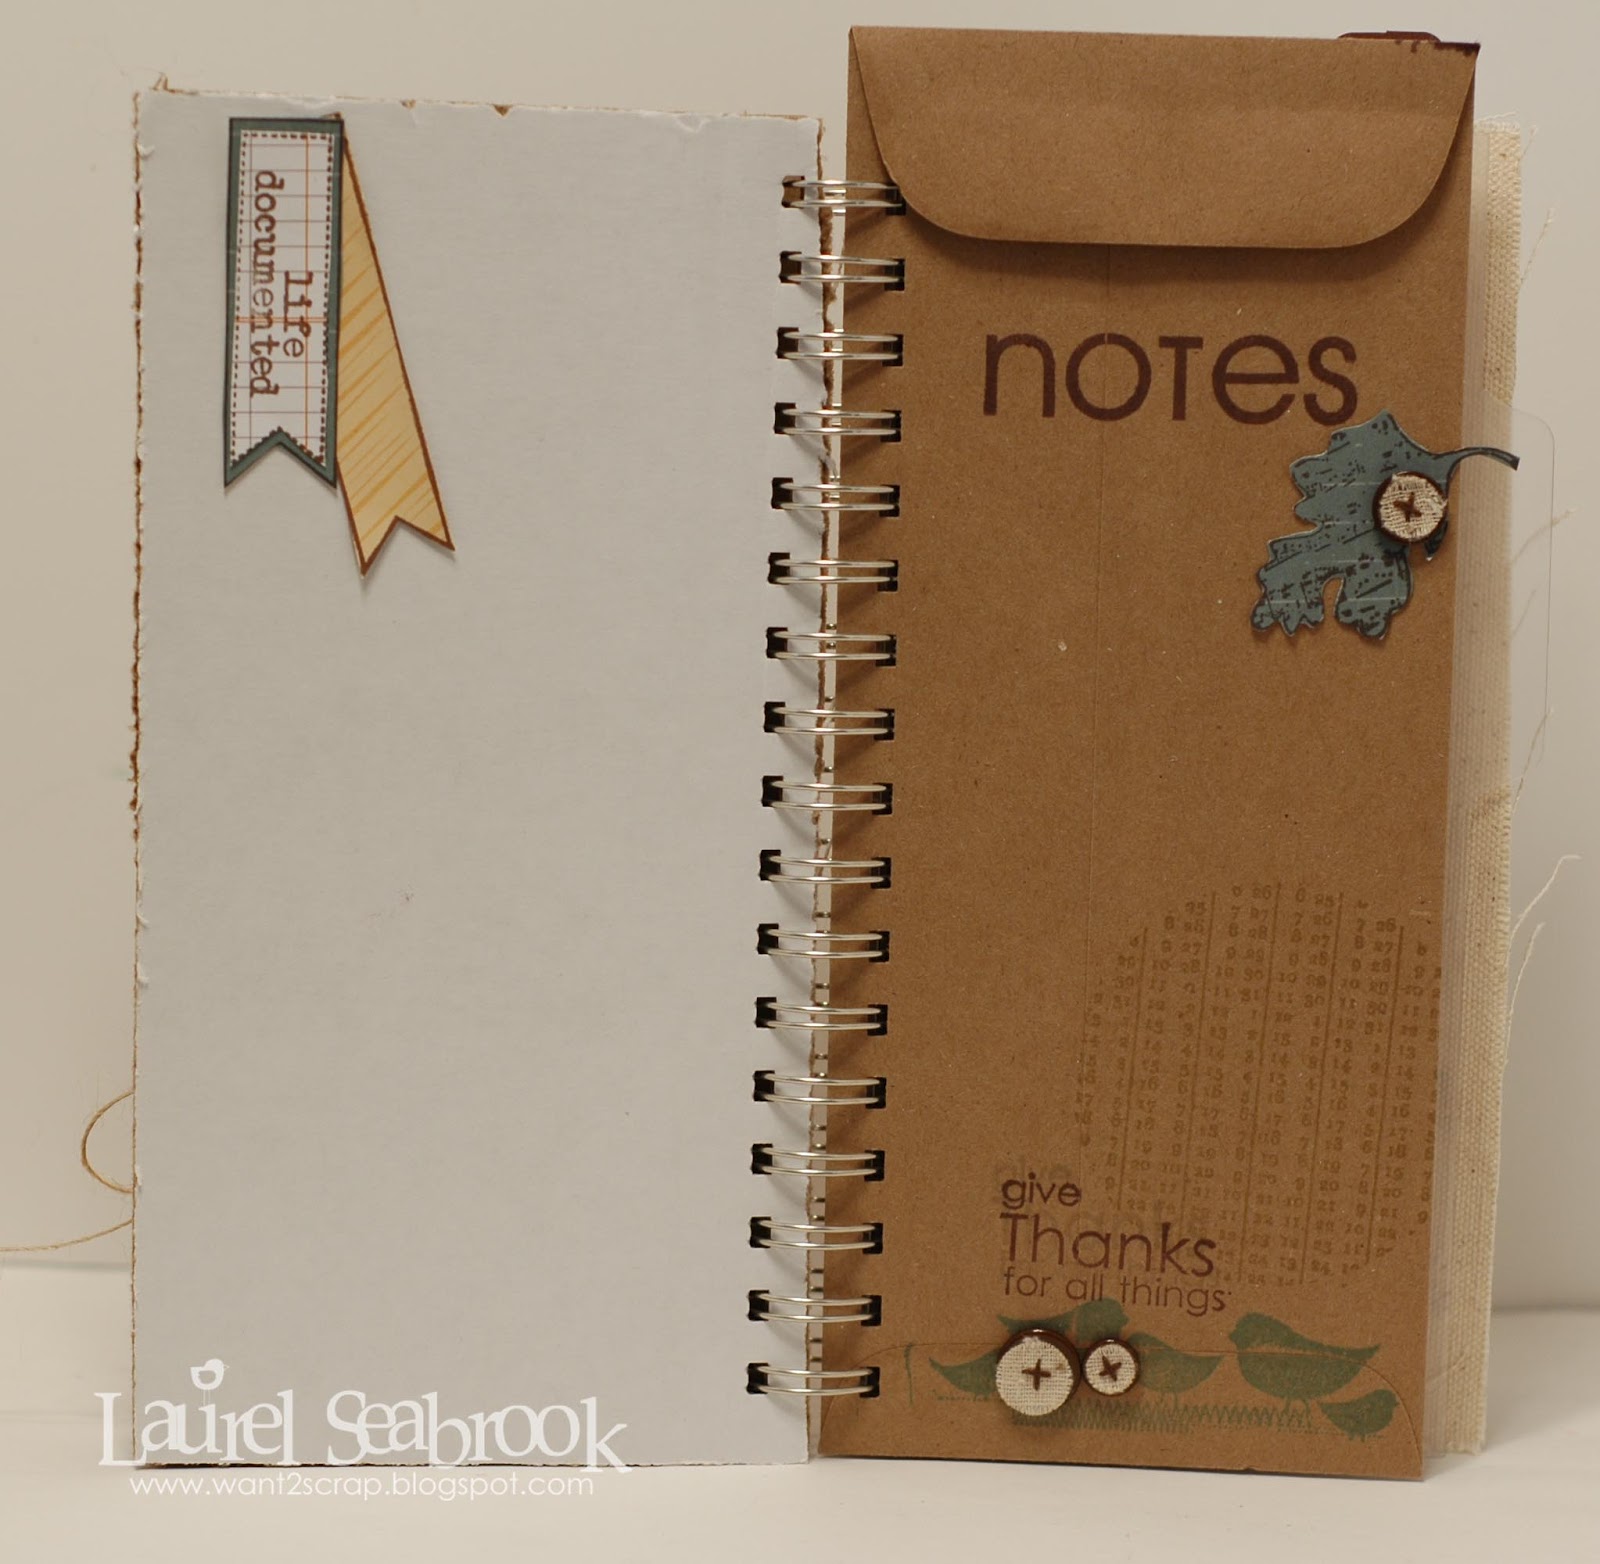
Hi everyone, Laurel here.  I am so excited to bring you my Basically Bare project today.  I loved this mixed album as soon as I saw it in my package and couldn't wait to use it.  I decided to make a Gratitude Journal and have left lots of space for adding photos I take, lots of journaling and I love the few envelopes for holding memorabilia or more photos.  I had a lot of fun creating this, I used lots of stamps and Cricut cuts and for adhering the items to the pages I have used the Beacon 3 in 1 Glue.

(Laurel has more pictures of her complete album on her blog)


Jodi Wilton created this CUTE altered frame project that I want her to send me!  I love how the two collections mixed perfectly! Let's hear from Jodi......

I used the six of the chipboard Hearts from to create a home decor project! The hearts were perfect because they were nice and thick, which added a lot of dimension to the project! I covered the hearts with EXIT HERE and AUDREY collections, and added the hot air balloon to tie in the title.


I (Katrina) made this layout about my first trip to CHA using the Audrey collection.  I will have close ups of the dress and heart on my blog. 

The girly collection was perfect for the dress form and wings!  I also used a canvas heart and some of the chipboard blossoms to accent my picture.  Double bonus is that that cluster also holds my layout title!  BTW, Suzy is glowing..I am sweating!  July in downtown Chicago during the heatwave last year!


Deana Boston had fun creating with the Basically Bare Celestial Shapes set using the sun and clouds for her layout about a flat tire!!  She used the Noah collection for her layout. 


Deana added sequins to her sun and wrapped twine around the felt clouds!

Melanie Jarocki created a couple of cute and fun cards using Audrey and Noah.


Sarah Eclavea has done a fun little mini with the Exit Here collection.  Here are a few of the pages from it.


Did you get some ideas?  Are you wanting to get your hands on some Basically Bare and Nikki Sivils, Scrapbooker goodies?  Well, we can help you with the Nikki Sivils, Scrapbooker part!  Leave a comment below and we will draw one winner for a collection kit of your choosing.  Basically Bare has a giveaway on their blog also, so be sure to comment on BOTH blogs!! And comment on tomorrow's post, because we will have a giveaway there too!


Thursday, May 17, 2012

Sarah Eclavea on Thursday.....

Sarah is here today and she has couple of layouts to share, plus a tutorial for stitching on your pages without a machine!

Faux Stitching Tutorial By Sarah


I love working with one collection at a time because it speeds up my scrapbooking a lot! I have everything out so I don't have to constantly take new supplies out and I can use the scraps from one project on the next which means less clean up too! I worked with the Messages collection for these two layouts and I LOVE this collection. It is just so stinkin' cute!


For my first layout, Amazing You, I used a sketch from the Allison Davis sketch book. This was my favorite sketch in the book, but let me tell you it was a close race! They are all great and I could see using them all! I also used some Helmar zap dots on this layout too. As I mentioned I like to keep scrapbooking quick and one of my favorite quick mess free techniques is faux stitching. All you need a paper piercer and a marker and you are ready to go. I faux stitched the hearts on this layout. I bet you couldn't tell until I mentioned it! Looks real doesn't it? Here's how I did it...
First adhere everything on your page that you want to stitch over.


Then use a paper piercer to poke holes through the paper where you want your stitching to  go. I have found the closer together the stitching is the more realistic it looks and it is helpful to have a quide. I will draw a line with a pencil if I need it and then erase it after I poke my holes. On this layout I just used the edge of the white paper as my quide so I didn't need a pencil line.


When all your holes are made choose a marker and connect. I used a brown pen for this layout, but my favorite is a white gel pen on dark colored paper. Don't worry if your lines are not perfect . It looks more realistic when they are a little crooked!

On this layout, Understanding Isabel, I wanted to journal all the things my daughter Isabel is saying right now. I also used some twine from The Twinery, Beacon 3 in 1 adhesive and Helmar Zapdots.


What fun projects from Sarah...and hey, she taught me to pierce some holes and then connect the dots!  I never usually pierce them.  Be sure to visit Sarah's blog for more fun.


Sunday, May 13, 2012

Happy Mother's Day!

Happy Mother's Day to all you Moms out there...doesn't matter if you are a mom to your kids, your kids friends, or just furkids!  All moms matter and we wanted to wish you a Happy Mother's Day!


Marielle LeBlanc
I made this quick Mother's day card by cutting up 3 of the "hearts" images from the Audrey's pictures paper and adhered them to my card with 3D foam, finished it up by adding some twine,a button and sentiment .


Deana Boston


Melissa Pablo
I used AUDREY line which is perfect for a Mother's Day layout. This is my dear mother and this photo was taken last February on her birthday. I also used The Twinery maraschino twine, Basically Bare heart shaped felt, NS burlap button, and Glue Arts U Cut It 3D adhesive foam blanks for dimension.


Julie Tucker-Wolek


Jodi Wilton


Melanie Jarocki

I used the Audrey line for this layout. The photos are matted on white cardstock and then cut to look like polaroid snapshots. I added bling from Want-2-Scrap to give the layout a little kick. The heart by the Nana title is actually the curled ends of a swirly bling piece. I snipped them off and pieced them together for the heart shape.


Stacy Rodriguez

Sarah Eclavea


Thanks for stopping by! And again, Happy Mother's Day!

01 09 10