Showing posts with label stickers. Show all posts

Monday, October 4, 2010

It's a Boo-tiful Monday!

It's a Boo-tiful Monday here at Nikki Sivils, Scrapbooker and I have some really fun projects to share in getting ready for one of my very favorite holidays: Halloween.  I think I have more fun scrapbooking photos for this festive celebration than any other holiday.  How can you not love black, orange, purple and green all mixed up together???  I'm getting a little giddy anticipating the end of this month and another year of photos.  What are your super cute little stinkers going to be this year?
Aren't these Boo-tiful papers and embellishments so much fun???  I love the bright colors mixed with the distressing and the ghosts are pretty darn cute, if I do say so myself.   Perfect for my little spooky girl.  She loves this holiday as much as I do and still insists on wearing her costumes all year round.
I mixed one of Nikki's cute little Craft Flags in with the ghosts and added the sentiment, "Boo!"  I also inked the edges with some chalk ink to make the white flag stand out more against the spooky white ghost.  Then I tied on a little polka dot bow for some added fun.
Nikki's Burlap Buttons make the perfect finishing touch by adding a little interest and texture to the layout.  The thing I love most about these, is you just stick the little suckers right onto the project.  No sewing necessary and no need to add adhesive.  I also used my Cricut to cut this shape in the striped paper to break up the squareness of the layout and then used the shadow feature to cut the black mat.
Nikki adds so many cute embellishments right into her papers.  I used a 1 1/2 inch circle punch to pull this pumpkin out of one of the papers.  Then I inked the edges and pop-dotted it to make it stand out more.
This card completely cracks me up!  I used one of the chipboard ghosts from Nikki's awesome Ghost Mini album that is currently being featured in this month's Creating Keepsake Magazine (see below).  I am a big fan of Nikki's 6x6 patterned papers and this striped paper is the perfect background for this spooky little guy.  I cut the sign from the embellishment page in Nikki's Boo-tiful papers and added the sentiment with some of her sticker letters from the Tree Love Collection.
Can you see it in the Number 1 spot???  We are all very excited about being featured, especially since we know how much fun Nikki's Chipboard Mini Albums are.  Make sure you check out the others HERE.
I'll close it out with one more card.  I can't seem to get enough of these frightening little ghosts, so I had to add them to the bottom of this card along with a big "Boo" sentiment which I cut with my Cricut using more of the 6x6 Boo-tiful patterned papers.  Hope you all have as much fun creating this month as I am...and don't forget to grab some of Nikki's Boo-tiful collection before it is all gone :)

Thank you so much for stopping by - Liz

Wednesday, September 8, 2010

Spring smiles

Hi there, it´s Monika here from chilly Sweden where fall is quickly approaching. Today I´m hoping to inspire you with a few layouts and a bottle full of love.


This is a really quick and easy layout with a photo from taken day after midsummer, I have used the Blueberry Hill collection and just added a few ribbons to it.


I really love some of the simple and clean layouts I have seen lately, but making one myself is a real challenge for me. Here I have used papers from the Boo-tiful line, I flipped the scalloped edge paper to reverse, white, side to make the border under the photo. The journaling is about my beautiful nice whom I love dearly.


This is my last layout, here I have used digital layouts as inspiration to achieve the layered look. The road sign decoration is a printed digital element and the bar code thingy was on my mascara. Al the papers are from the Tree love line.


This month I will have to spend two weekends away from my daughter. It´s very rare that I´m not home when she goes to bed and I will definitely have a hard time to be without her. I know she will to. That is why I made this little milk bottle for her and filled it with kisses, hugs and “I love you-s”. I explained to her that every time she misses me, she just takes out a note, reads what is on it and knows that she got a kiss, hug or “I love you” from me because that is what I have put on each piece of paper.
I have used the Pocket of Stickers-Red Crosshatch to decorate the jar.

Friday, August 20, 2010

summer celebration

Jill, here, from the Willie Bee Diva House Design Team, enjoying the hot summer dayz in Manitoba and anticipating the beautiful harvest that is quickly approaching.

I strongly believe that you should always make time for celebrating -- birthdays, anniversaries, new born babies, and the list could go on endlessly. REALLY....... I could celebrate almost anything for no particular reason.


So........ I decided to create 2 different projects for this post that celebrate 2 different events of summer celebration.


The first project is a mini fabric album created to celebrate a wonderful Sunday afternoon spent with family -- using the 6x6 mini pads: Blueberry Hill & My Friend Birdie. I also used a few stickers on the cover and some journalling stickers throughout the pages of the album. Here's a little peek:


LOVE the little chipboard journalling tag (owl) on the back page of the album. I inked it with (pink) dye ink and then whitewashed some paint onto it. A bracket and some journalling complete the album.


The second project is a party invitation created from a pocket (actually it's the packaging from some of nikki's sticker collection). I've mixed a few different lines on this invitation (new & older): Blueberry Hill, My Friend Birdie & Bella's Cutie Cut-Ups.


Using the chipboard tree shape (from the chipboard albums), I snipped off the "trunk" to create the end of a balloon. With some paper from the My Friend Birdie mini pad, a few stickers, a stamp, some doodles & journalling, I set the balloon sailing with some ribbon -- it's tied to the bottom of the balloon and then taped inside the pocket.
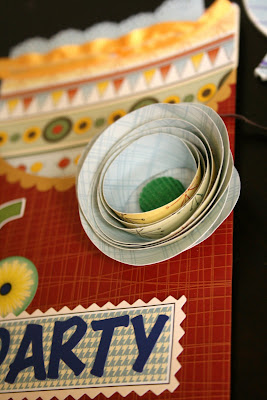
I created a 3D flowers and attached it to the pocket with these corduroy brads -- they rock!!!! love ALL the colours!!!! Also used my pinking shear scissors around these fabulous labels.


Hope you find a little bit of end-of-summer inspiration here today.


enjoy,
jill
01 09 10