Showing posts with label Cute as a Button. Show all posts

Tuesday, June 26, 2012

Katrina with some Alpha Sticker Fun

Hey everyone, it's Katrina here just sharing some layouts with you!  I have one from Exit Here and a couple from the Noah collection.  Also, I am going to show you how you can mix all those fun alphas from the alpha sticker sheets that are in the collections.


We Call Road Trip

The dogs love taking car rides most of the time (as long as they don't know it's a "v.e.t." trip!) and they also like going to get Andy's Frozen Custard!  So, I took the opportunity to take some pictures of them hanging out the back of my Element in the parking lot waiting for their custard!  Exit Here was the perfect collection for this...since they are calling a road trip for ice cream!  (BTW...we have four dogs now, this was before the puppy.)  This is an 8.5 x 11 layout, which is a size that was perfect for the photo strip I created.


I love to mix the alphas!

Adding little touches  with the Cute as a Button Burlap Buttons and with layering the punch outs and stickers gives your layouts some interesting focal points and details.  


Snips, Snails and Puppy Dog Tails

Jetson loves to dig and I had captured these pictures one day when he was in full digging mode.  The Noah word strip was where I "started" with the layout idea and it grew from there.  The title was inspired by the cut-up snail that I think is so cute and had to use!  Titles are hard sometimes for me, so I look for something in the paper lines to inspire a "play on words" a lot of the time.


Once again, I love mixing the alphas in the title and the tiny journaling tags are a great place to add some of those fun mini letter stickers to highlight your title.  


I used the negative space of circles, backed them with pattern paper and then embellished the centers to make them stand out.  I used an odd number of circles, which always seems to work better....3, 5, or 7, etc.  I backed two of the circles with the same paper to give some unity to the circles and to also make the center one stand out.  


Spending Time with Dad

I love this picture of Carleen and her dad at the baseball game we went to when he came for a visit.  The Noah papers were perfect for the picture and I played off the stars all over the layout. 


I punched a few various sized stars out of some of the papers of the collection and used them as accents on the layout.  


 Once again, I mixed the alpha stickers.  These blend seamlessly between collections and are perfect for long titles. 

I hope I have encouraged you to try mixing up those alpha stickers you have in the collections and creating some fun and unique looking titles for your pages.  I will have a couple of additional photos of a the projects on my blog.  Thanks for stopping by today!


Tuesday, April 24, 2012

Fourth Tuesday with Diva Katrina Hunt

Hey everyone, it's Katrina here with my projects for the month!  It seems like the month has just flown by and I looked at the calendar and went, "oh my gosh I have a blog posting due"!  

I love working with all the collections and every time I think I know what my favorite it, it changes!  The projects I am sharing today are with the Messages collection kit. 

I decided to do an 8.5 x 11 layout.  I just wanted to do a simple and clean layout and that size works perfect for me to do that. 


I used a scallop circle punch to make my border here with the houndstooth paper and then just added one of the hearts from the punch out page.


I wanted to accent the journaling card and I went to my standby-twine!  I also used one of those Cute as a Button burlap buttons that I love so much.


And these were in the booth at CHA, my altered books.  Nikki asked me if I wanted to do them and Messages was the perfect collection to do them with!

I used matte medium gel to adhere all the paper to the books and I also used a layer of it to seal the books after I got them finished.

 I used a border punch on each side of the paper that covers the seam to give some detail to it.  Then, I added some of the cut-ups on each of the books.  I didn't want them to have too much stuff on them, just enough to make them interesting!

That is all from me today!  We have a lot of fun stuff coming up on the blog later this week.  Including one more Diva posting for the month and then a fun blog swap with Glue Arts!  Be sure to check back by!

And if you feel like it, stop by my blog sometime!!


Wednesday, April 18, 2012

It's the Third Wednesday and Stacy is here!


It's no secret that Stacy loves to alter things and she has been very busy doing that this month.   Altering Wendy Vecchi Art Parts Stacy came up with this cool way to display messages complete with a little bit of cork.  This project was created using the Messages line, which has lots of fun die cuts shapes that would go perfect on any message board. Don't forget to add those burlap buttons for that little touch of added embellishment.


Up next Stacy continues to share her little bit of vintage with us!  This is a very special project that she created for our very own Nikki.  Using the line Audrey, in honor of Nikki's grandmother,  Stacy created this unique way for Nikki to display a photo of her grandmother.


So, Stacy went totally vintage with these two collections and she showed us just how versatile you can go with these Nikki Sivils, Scrapbooker collections!

Be sure to visit Stacy at her blog!


Thursday, March 29, 2012

The Twinery and Nikki Sivils Blog Swap Day One!

Today is the first day of a two day event with The Twinery.  The Twinery has some of the best, most fun, and colorful baker's twine out there and we are happy to be doing this swap with them.  They were recently featured on the Martha Stewart show also!


Both companies are having giveaways each day also!  So, see the bottom of this post for details on how to win!


Also, be sure to visit the Diva's blogs for additional pictures and projects that may not be posted here! 

Our Diva's were sent the Ultimate Sampler pack to play with and they have some up with some fun creations combining Nikki Sivils, Scrapbooker products and The Twinery baker's twine.  


First up is Diva Melanie Jarocki with an adorable friendship card using the Audrey collection.


I used Peapod and Pink Sorbet twine to stitch around the hearts. For the sentiment border, I used Lemondrop twine. All three of these colors matched the Audrey collection perfectly!


Diva Jodi Wilton is here with her adorable Easter theme layout titled, My Little Bunny.  Jodi used the Exit Here collection for this!  And she also used the Cute As A Button burlap buttons.  

I absolutely LOVE working with The Twinery twine, and for this layout I was determined to use a few different techniques with twine on my layout.  I started with the idea of making grass out of twine. I took double sided tape, and looped it up and down at various lengths to create the idea of grass. I then thought of the whiskers on the bunny.  To make the flower center, and bow center. I added double sided adhesive sheet to cardstock, and punched out a small circle. Then I wound the twine, starting in the center of the circle. I trimmed off with my scissors any remaining cardstock showing. I wound twine around the stem (or mini dowel) too! 


A close up of that cute bunny and those EGGS!!!  Perfect paper to create striped eggs with!


Next up is Stacy Rodriguez and she has a cute mini book with Exit Here also!  Stacy is doing  double duty as she is also a member of The Twinery design team!  She has additional pictures on her blog, so be sure to check it out!  


I simply LOVE this line since we hang out at my parents camper at the lake during the summer time.  Using the North Pole Nights album made this project a breeze.  This mini has room for some of those fun camping photos along with room to journal.  It's held together with 2 jump rings, which I wrapped in Buttercream & Shore twine from The Twinery.  The banner along the top is held together with Cappuccino twine. 


I also wanted to make sure I placed the lot number of the camper on the fun little sign.  The Peapod twine was a perfect accent around the bottom of the sign. Helmar 450 quick dry glue is what I used to hold the twine in place.


And here is Jennie McGarvey with an easy layout to create using the Noah collection and The Twinery Baker's Twine.

I created a grid and hand sewed with the twine. I filled in with photos and paper -- plus my favorites, the burlap buttons.  I really wanted to let them speak for themselves, so I added them in blank spaces!  


Ms. Julie Tucker-Wolek is our next Diva and she is using the Messages collection.  She made  a "hanging element" on her layout.


So, you want to know what the giveaways are right?!  

Here on the Nikki Sivils, Scrapbooker blog we are giving away a collection kit each day of this two day blog swap!  Your choice out of the four new collections! 

The Twinery will be giving away an Ultimate Sampler pack each day also!  SO.....you 
want to know how to win?

Just leave a comment here on the blog and over on The Twinery blog each day and you are entered!  Simple, quick and easy, right?!  

We will announce the winners of the collection kits here on the blog on Tuesday April 3rd, so that gives you plenty of time to enter!


Wednesday, March 21, 2012

Third Wednesday with Diva Stacy Rodriguez

How about a little step by step project everyone!!  Diva Stacy Rodriguez created this fun little photo brag book that fits perfect in any purse so you always have pictures of your special ones to share.

(Note..you can click on the pictures to make them bigger!)

 
Stacy used the Noah collection, Cool Cord Brads, Cute as a Button Burlap Buttons and The Twinery Baker's Twine in Denim for this card.

You will need to cut a piece of cardstock to 4" x 12".  Score the cardstock at 2", 5 1/2", and 8 3/4".  Once you have done this corner round the ends by the 2" score line.
 

Next you need to cut 3 pieces of cardstock to create the flap where the photos will go inside.  Cut these pieces to 3" x 8" and score all of them at 4" in length.


Now you can adhere these flaps into the inside part of this little album.  You are going to want to alternate which way these open.  All you need to do is place adhesive on the backside of the flap and center in between the score lines on the 4" x 12" piece of cardstock that you first cut.


Now the fun part...time to decorate this.  I used the Noah collection for this one.  You will need 4 pieces of pattern paper that will go across the front of the flaps on the inside and along the cover of the photo mini.  You can cut these about 1/8" smaller then 3" x 4".  You can also cut 2 pieces of pattern paper for the 2" x 4" flap cover the same way.
 
Embellish any way you would like with all of the fun die cuts that come with this line.  I also added a brown burlap button on the lower right of the cover ( i simply LOVE these buttons)!!!


To keep the closed I placed two white cord brads as shown on the cover.  Tied a little twine around the top brad, then just wrapped the twine around the two brads....worked like a charm!
 
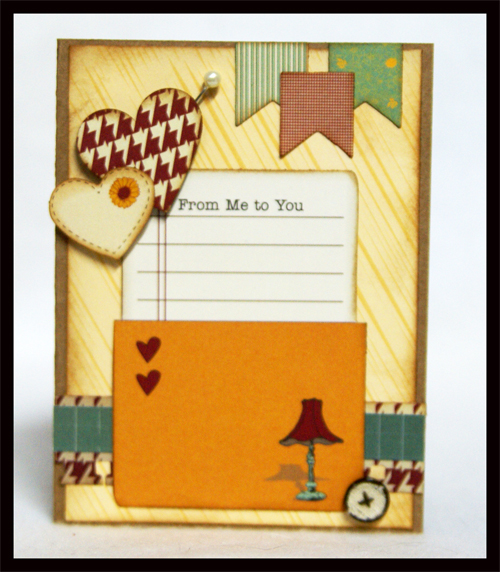
Up next is a card I created using the Messages line and the Cute as a Button Burlap Buttons.  I LOVE the Messages collection.....the colors, the design, well it's just yummy!!!  This card is just waiting for me to let someone know i'm thinking of them.


Wow, for Stacy's first post, she created quite the card tutorial for you!  I am sure we will see more fun things from Stacy soon!

Be sure to visit Stacy's blog.  Let us know if you use Stacy's tutorial!


Thursday, March 15, 2012

Third Thursday with Katrina

Hey everyone!  My day to post my projects on the blog here.  I always find it so much more exciting to post the design team Diva's work than my own here!  

I had some fun with the Exit Here collection.  
I think this is my favorite collection for this release. 

As you know, we have cross promotions with different companies in the industry.  It's a great way to support each other.  These arrows are from Basically Bare and I thought they went perfect with my travel themed layout!  Plus they are fun to alter!

I had leftover scored pieces of paper and I wanted to try to use them up.  I free hand cut the two bigger hearts and then I just folded the yellow heart paper and left the ridges.  I used some Scor-Tape on the back of the piece and then just adhered it to my card front.  I did this a while back and it has stayed, in case you are wondering!

Just a fun little tag!

Next up is a layout that I did with the Noah collection that is appearing over at Sketch Support today.  Allison is our Guest Designer this month, so be sure to stop back by tomorrow and check out her fabulous projects she will have up here on the blog.

 I love the punch out sheets, so fun and cute!

I don't know about you, but I am ready for the weekend.  This nice weather is giving me Spring Fever a little too early in the season!  Have a wonderful day.  


Wednesday, March 7, 2012

First Wednesday with Melanie Jarocki

We are so excited about Melanie's first official posting here on the blog and we think you are going to be too!  We have a three layouts, one of which is a double page layout, and a card!  So, let's hear from Melanie, herself, about her projects today!

Date Birthday Age
For this layout I wanted a really cheerful, happy feel--the Exit Here collection was perfect! I layered 3 of the patterned papers under my photo for special effect. Mixing up the letters on the title gives it a playful look as well. I love adding banners to my projects--this won't be the last of them you see.


You are Loads of Fun Card
It's always great to have products to make boy cards. I have three boys so I want to have special cards and notes for them as well as my girls. The Noah collection's primary colors and fun graphics will get plenty of use in my house! And I love the Cute as a Button burlap buttons to add a finishing touch.


Weekend Getaway
I loved using the little die-cuts from the Messages collection to add 
a little extra detail to my photos.


Jokes
When my oldest son was six years old, he had a heyday making up his own jokes. I used the Messages collection to record a few of them. I printed directly on the ledger paper and then handwrote my journaling on the journaling pocket. Instead of using the die-cut pennants as a banner, I turned them on their side to accent the photo.


I don't know about you, but I LOVE the fact that Melanie used the collections out of the collection theme!  Try doing it sometime and see what you come up with!  

We hope you enjoyed Melanie's projects today and that you will also go visit her at her blog.


01 09 10