Today, I´ll show you step by step instrucions on how to do this layout, “Bee Mine”, where I used Willow Bee collection and added a lot of three dimensional elements .
Instructions:
Cut out a honeycomb piece of paper from the Willow Bee paper.
Glue this cutout on the black background paper and retort the sides, leaving around 1/4 inches of edge
Next, position 2 letters “ z” taken from an alphabet and sprinkle yellow spray on.
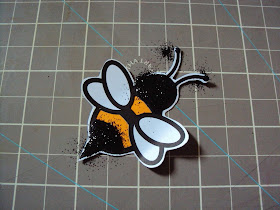
Cut out 2 paper bees from Nikki Sivils’ Cutie cut ups paper and glue to the page, on the top right hand corner.
Sew it as shown
Next, cut a rectangle (size 4 1/2 X 91/4 inches) and sew it to the page. Cut out a 8 inches strip from Nikki Sivils’ Bee strips paper and glue it to your project.
Cut out a piece from " A Good Place 2 B" paper
Adhere it to your project and also glue a plaid strip of paper and the honeycomb
Next, cut out all these elements: a blue journaling tag, 4 varied size sunflowers with stem, 3 halves of sunflowers, 4 varied size bees, 2 small clouds, 1 journaling tag cloud and 1 journaling tag sunflower
Add another strip of paper, the journaling tags and flowers with 3-D tape as shown
Add glitter to the head, antenna and buns of your bees. Also add stickles to the wings of the bees and puffy paint to your clouds.
Next, adhere sunflower halves to the page. One in the top part and another in the bottom, next to the journaling tag. The top one you should glue it with 3-D tape and there´s also another one next to the honeycomb.
Glue other bees and clouds to the page and the sunflowers with stem (3 in the bottom, reversed and 1 on the right side next to the journaling tag cloud)
Add the photo corner to the page.
Cut out two honeycombs with little bees from Nikki Sivils’ Willow Bee´s Cutie Cut- UPs paper .
Throw black glitter and take off the excess with a fine brush. Let it dry
Use a template taken from the inside of a honeycomb and cut out your pictures in the same hexagonal shape
Using the same template, cut out from a black cardstock paper two hexagonal boxes which will guarantee a special volume and shading to your page
Glue the inside parts from the honeycomb you prepared, on the top part of your hexagonal little box, and close all the sides of the box.
Glue the little boxes to the page. (For those of you who don’t want such a big volume you can just glue the honeycombs with 3-D tape)
Add ribbon to the stems and leaves of the sunflowers and your tittle.
Have a nice day!
Larissa


What a wonderful layout, thanks for sharing!
ReplyDeleteWowwwwwwwwwwwwwwwwwww!! Larissa!! You are AMAZING!!!! This is JUST WOW!!!! Thanks soooooooooo much for sharing your tips!!!! :):):):):):):):):):):):):):):):):):):):):):):):):):):):):):):):):):)
ReplyDeleteSO much cool detail here!
ReplyDeleteWOW Larissa this is AWESOME!!! Gorgeous work girl! :))
ReplyDeleteWow!! So many little details here! Love it!
ReplyDeleteOMG. This is beautiful!!! What great inspiration.
ReplyDeleteWow.... I'm not sure what to say... this is beautiful!! Thanks so much for a wonder layout and post!!
ReplyDeleteWowie, clever and wonderful! LOVE all of your photos of the steps because you have use so many interesting techniques.
ReplyDeleteWhat a wonderful tutorial! Love the many details. TFS!
ReplyDeleteFabulous LO! Thanks for the step by step!
ReplyDeleteGreat tutorial. Thanks for sharing.
ReplyDeleteWHOA! What a FANTASTIC page! Love how you included the process of creating this masterpiece! :)
ReplyDeleteEs precioso!!!
ReplyDeleteGorgeous work!
ReplyDeleteBeijos ;^D
Great post, Larissa! :-)
ReplyDeleteGorgeous, gorgeous work!! ^_^
ReplyDeleteWowza! Not only is your layout fan-freakin-tabulous, but it's so cool to see it all come together... step by step. Thank you so much for sharing your talent. You're an amazing scrapper!
ReplyDeleteAbsolutely fabulous!!!!!!!! LOVE the page and loved looking through the step by step!
ReplyDeleteIt 's Great! i like this work very much! Thank you for sharingyour ideas!
ReplyDeleteSweet! Love it!
ReplyDelete